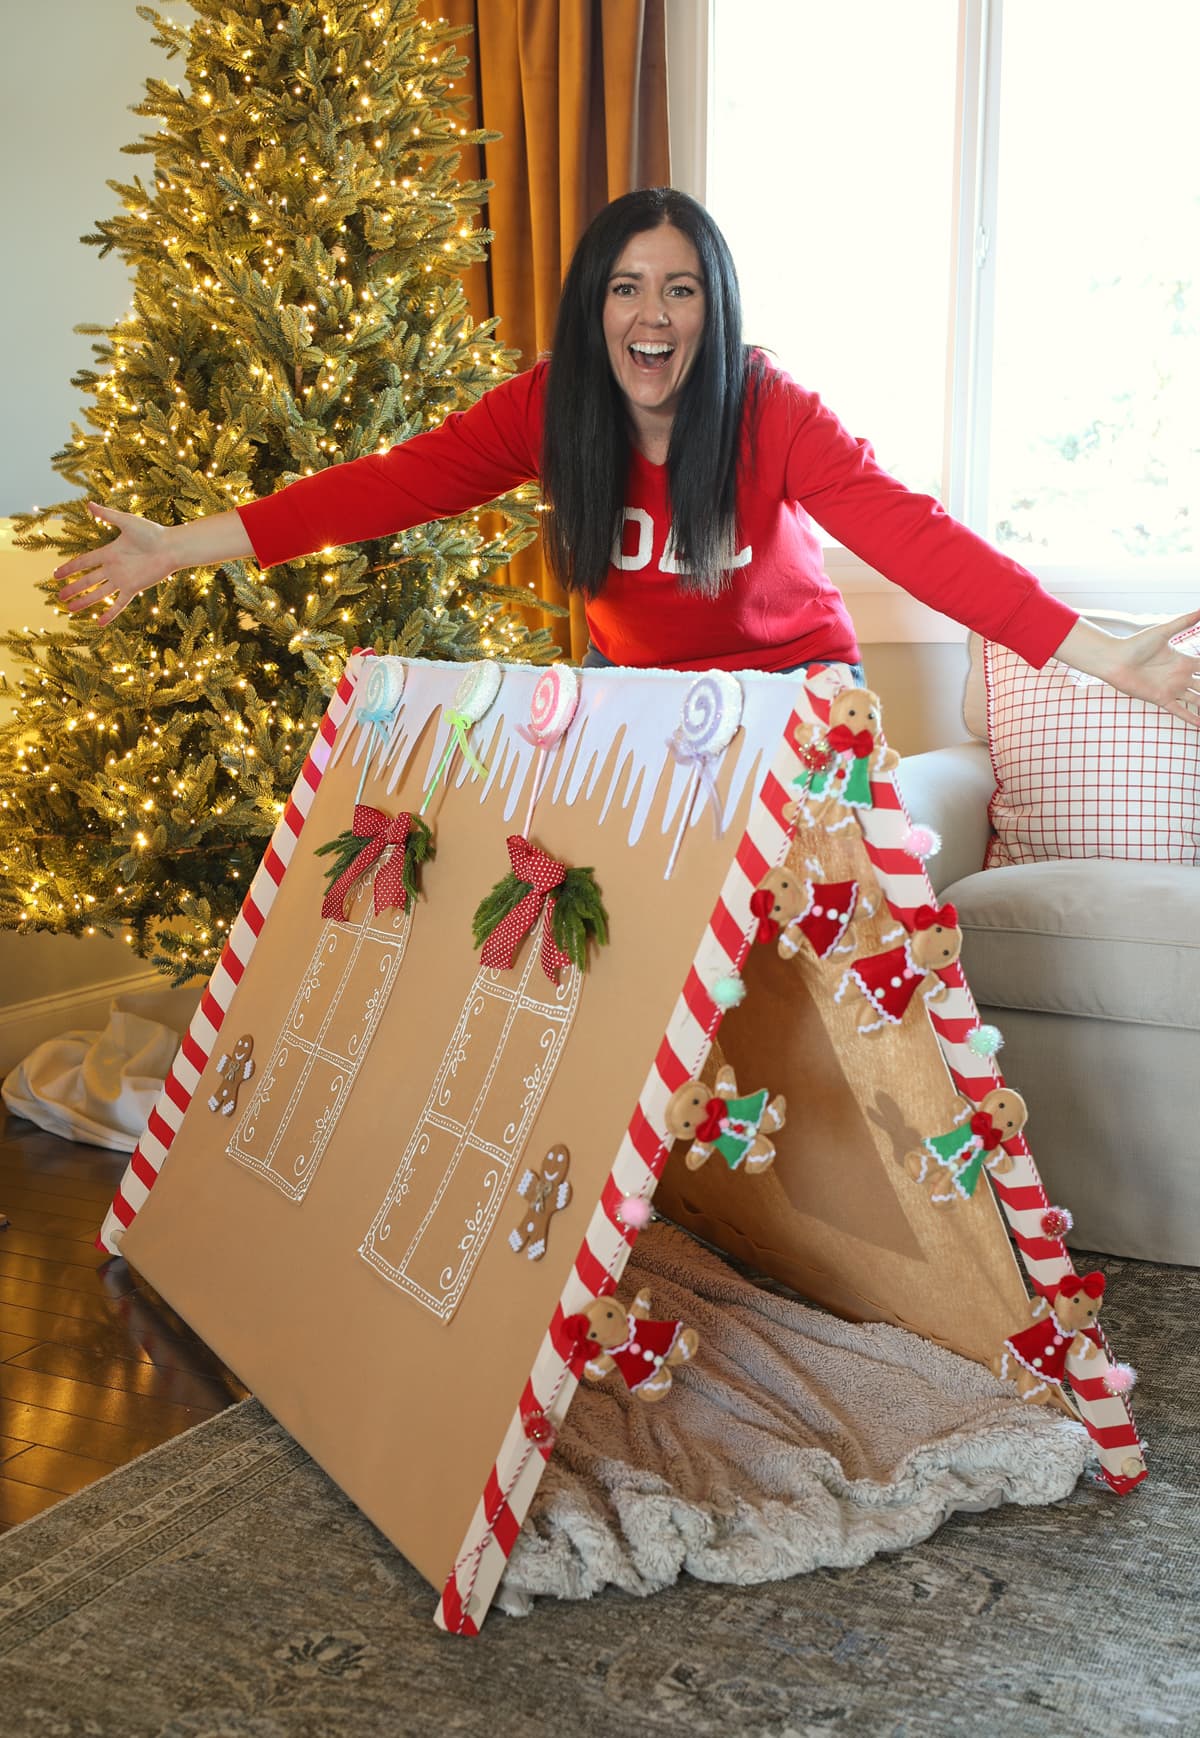
Learn how to make a darling play tent that looks like a gingerbread house. This is such a fun no-sew Christmas craft to make for your kids.
Hi friends! Let’s make a magical Christmas craft together today.
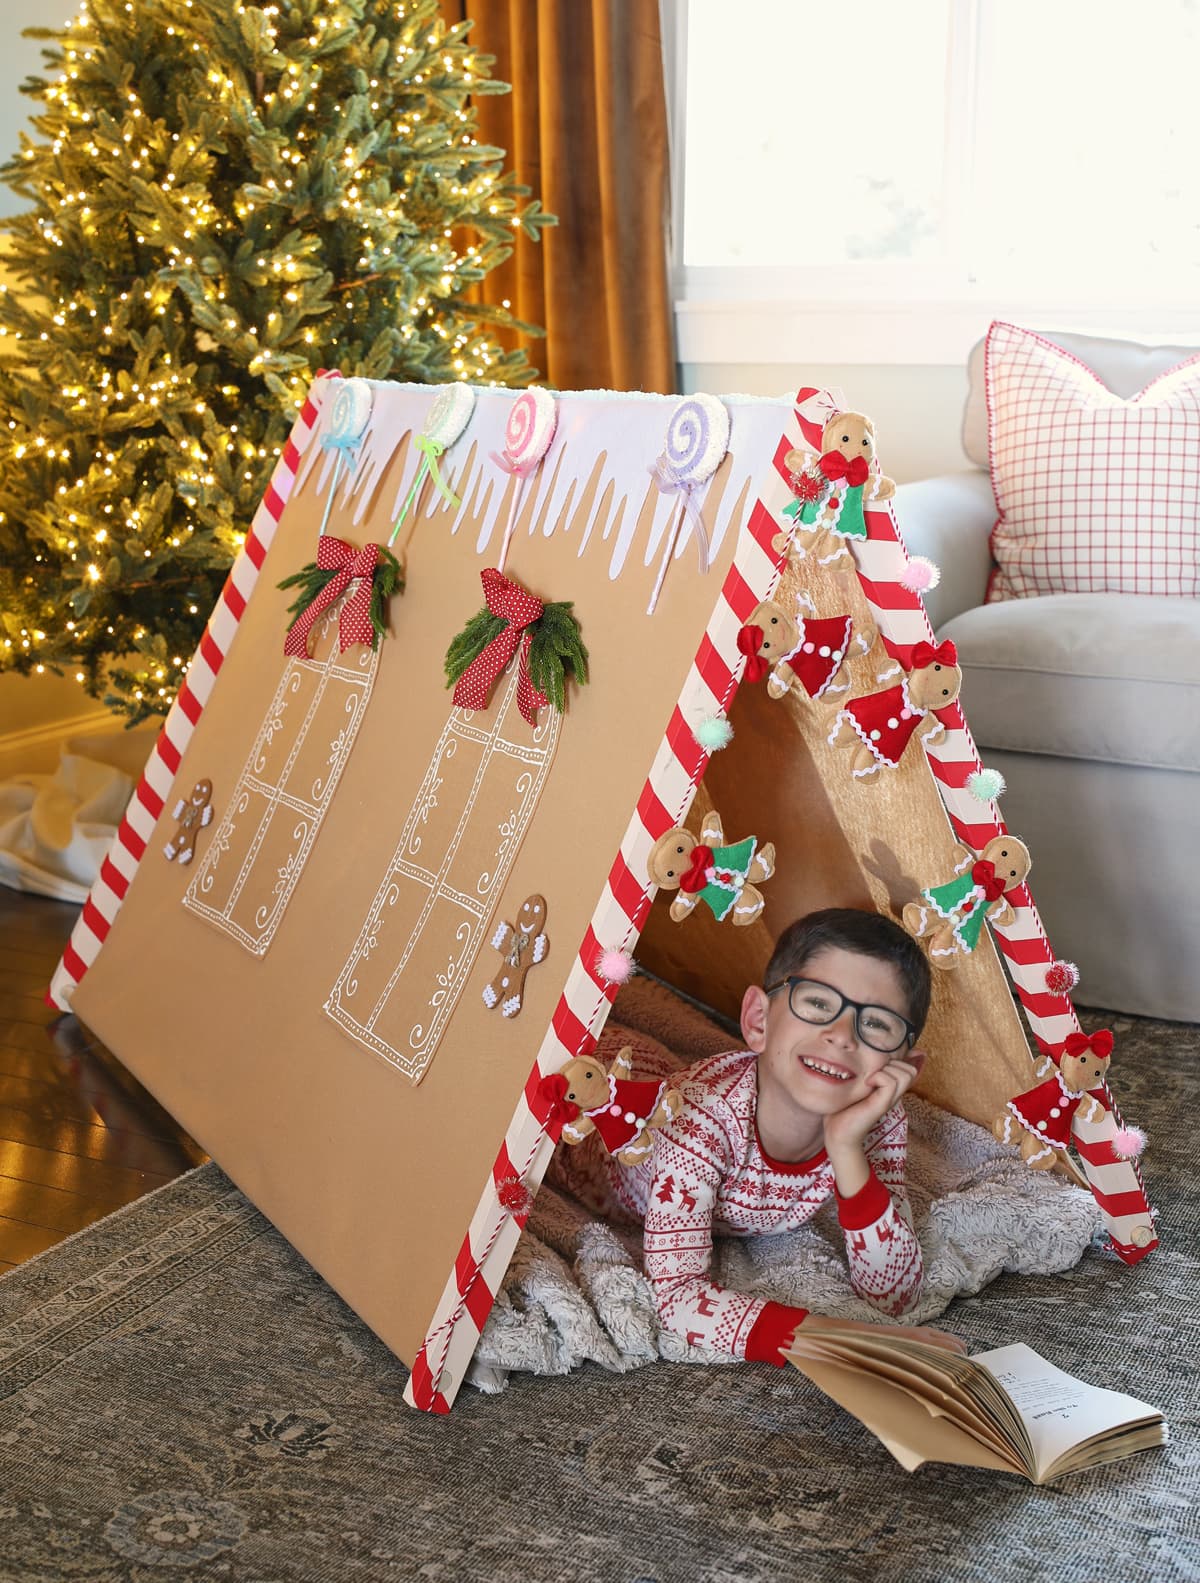
I’m going to show you step-by-step how to make the most darling DIY gingerbread house play tent for your kids or grandkids. It’s pretty simple to make but will provide the perfect little hideout for your kiddos to read, play, and dream of sugarplums and jingle bells.
This post is sponsored by Hobby Lobby.
Let’s go! Here are the supplies you will need to make your very own gingerbread house play tent.

Materials Needed
Click on any highlighted item in the supply list for more information.
Optional Decorations and Accessories

I got everything I needed to make this project from Hobby Lobby except for the wood boards and the longer 4 foot length dowels.
The felt is located in the fabric section. If you’ve never bought fabric before, just grab the whole bolt of the felt and take it to the counter in the fabric section and they will cut the amount you need. Ask for 1 2/3 yards. I chose the lighter tan color, but they also had a nice camel color called “Copper Canyon” that you could choose. You can see both colors in this photo:

Hobby Lobby has SO MANY cute gingerbread candy decorations that it was really hard to choose what to use. Definitely go walk the aisles to see what accessories strike your fancy. Seriously, there are so many fun options. It would also be fun to take your kids so they can pick out some candies.
Instructions
Building The Frame
Step 1: Cut four 1′ x 2′ boards down to 3 feet in length. I bought two 6′ boards and cut them in half.
Step 2: Use a 3/4″ drill bit to carefully drill holes into both ends of each of the 1′ x 2′ boards. They should look like this:
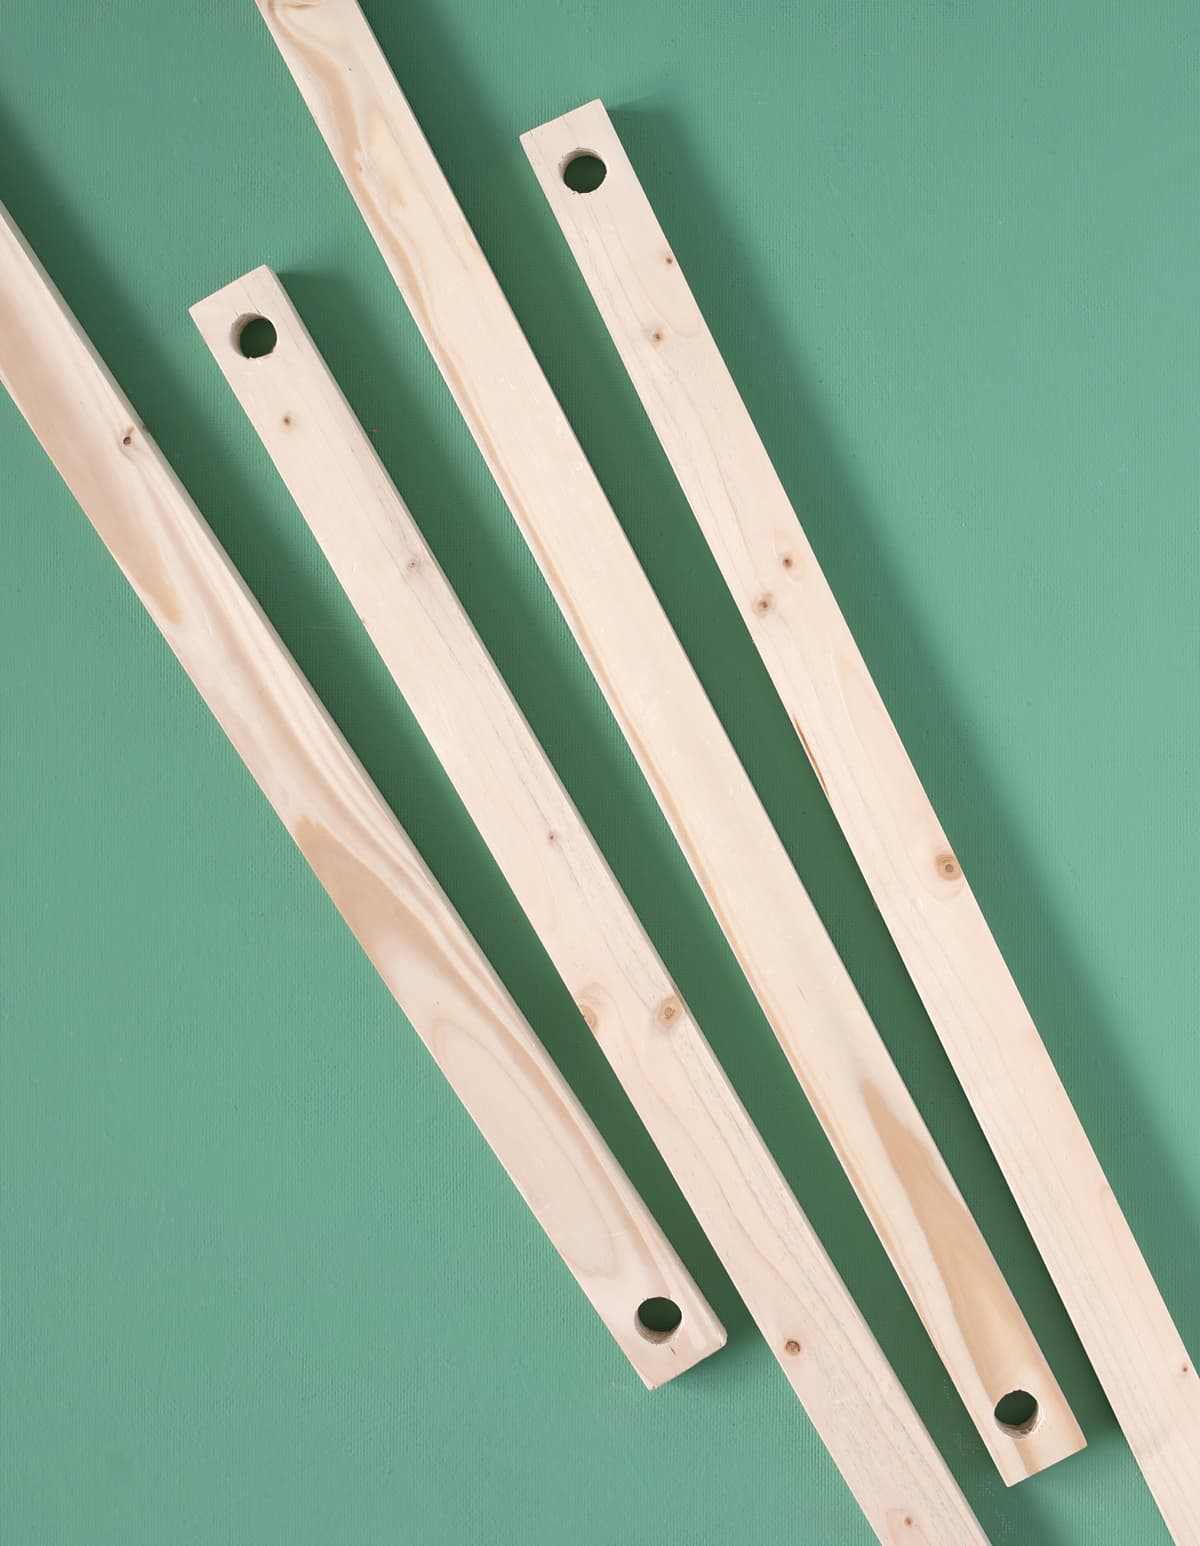
Step 3: Sand the boards really well so there are no rough spots. Slip the dowels into the holes for a test fit. If the holes are too tight, sand them until the dowels fit nicely inside. You want them to be snug but not impossible to move.
Step 4: Paint the wood. I chose a very light pink spray paint (color name: Pink Peony). Then wrap the boards with red masking tape so they look like candy canes. If you can’t find red masking tape, paint the boards red, then use white masking tape for the stripe. This worked so well and has such a big visual impact. I definitely wouldn’t skip this step!

To assemble the tent, place two boards onto the end of a dowel, then the other two boards onto the other end of the same dowel. This will be the top roof line peak of the tent.

Spread the boards apart, then insert the remaining two dowels into the remaining holes. These form the bottom two sides of the tent and will be where you attach your fabric.
Your tent frame will look like this:

Make The Felt Gingerbread Tent Covering
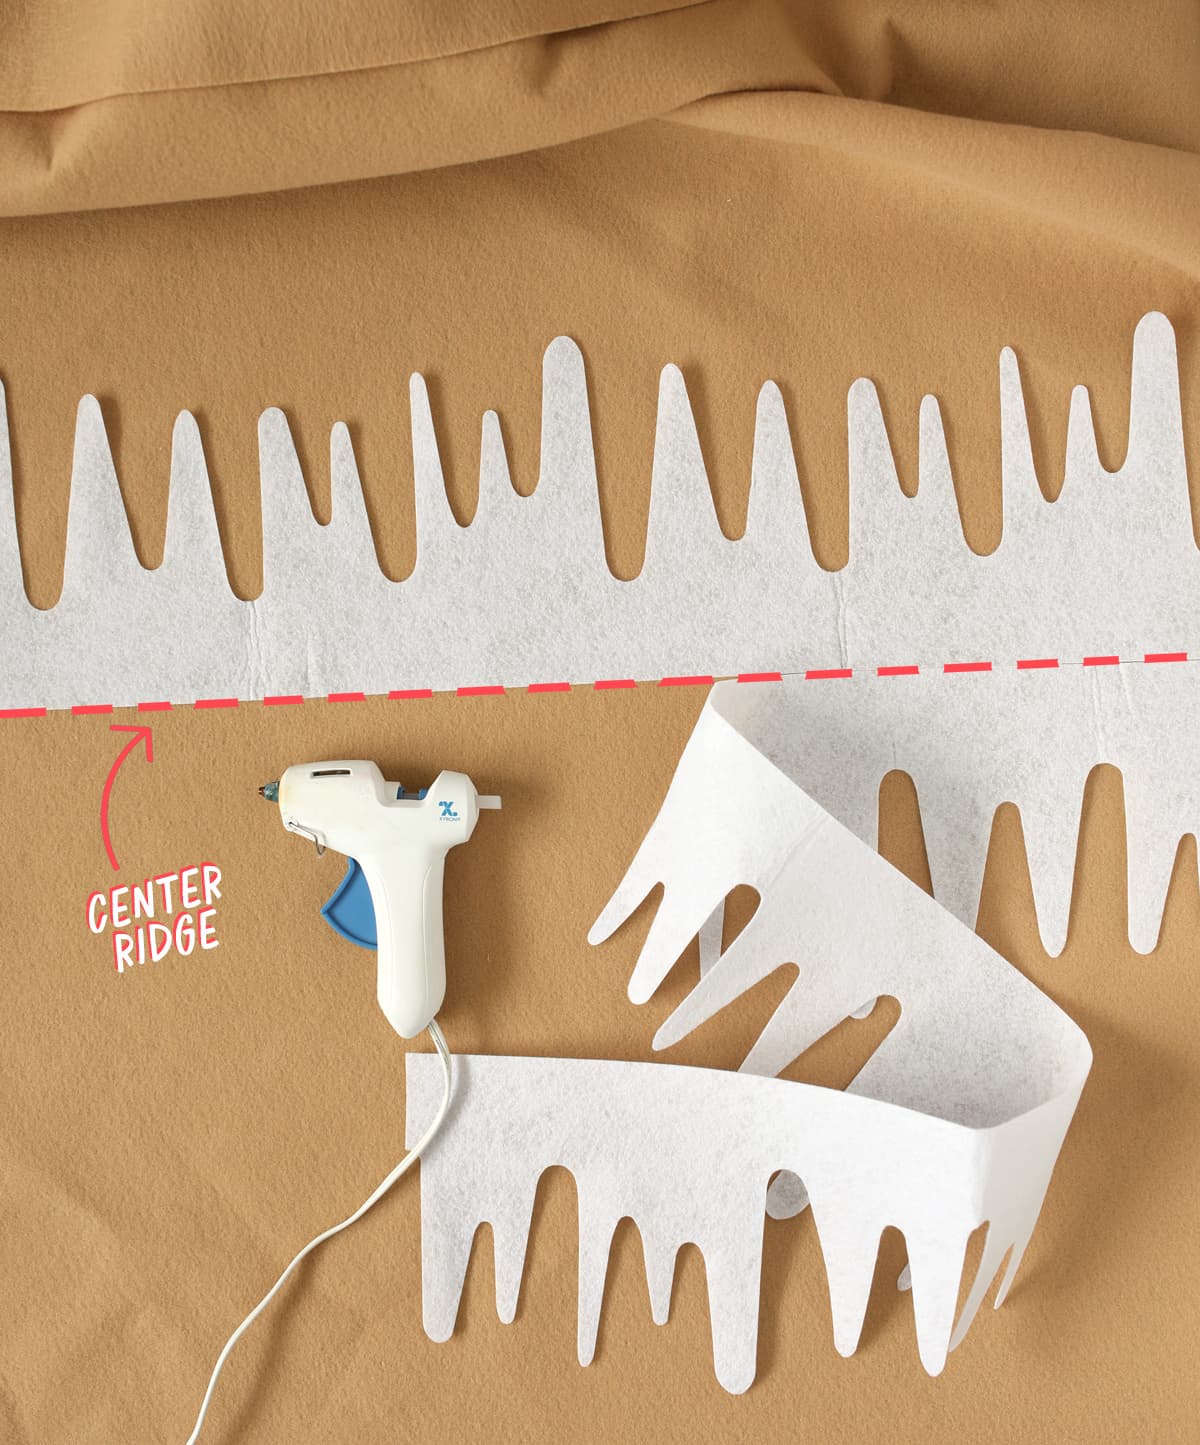
Step 1: The felt fabric from Hobby Lobby comes in a 72″ width, which is just the perfect size for our tent, so you only need to cut it to length. My felt piece ended up being 44″ x 72″. I used my quilting mat and rotary blade to make super straight and square cuts, but if you don’t have those, measure carefully, draw a straight line on with a ruler and cut with fabric scissors. It’ll be great. We’ll be using the extra fabric, so hang on to it.
Step 2: Mark the center ridge line of the fabric. This will be the top roof line of the tent. Glue felt icicle garland along both sides of the ridge line. Trim off the excess so the icicles line up with the edge of the felt. One package was the perfect amount… yay! I love when that happens!
Step 3: Using the extra brown felt fabric, cut out a window shape. I used a dinner plate to get a rounded shape, then drew straight lines down to make cute arched windows. My windows ended up measuring about 10.5 inches wide and 17 inches tall.

Step 4: Use puffy paint to draw details onto the window. More is more here, so really go for it. My puff paint took about six hours to dry, so you might want to plan around that and do this part right before bed so they’re ready the next morning. Lay them flat somewhere safe where no one will bump them. You do not want all that hard work getting smeared!

Tips for Working With 3D Fabric Paint (Puff Paint)
- Keep your wrist on the table as you draw to stabilize your hand.
- Smearing is your worst enemy so roll up your sleeves, tie back your hair and work really carefully so that you don’t rub your hand across wet paint.
- If you want a really smooth line, keep the tip of the paint right ABOVE the fabric instead of pressing it into the fabric. You’ll get a much nicer look that way.
- Wipe off the tip of the bottle every so often to remove any paint build up.
Step 5: Once the puff paint is completely dry, use hot glue to attach the windows to the main tent structure.

Step 6: Make little greenery swags to go above each window. The floral picks I bought had four bunches of pine, one bunch of pine cones and two bunches of berries all attached together, so I tore apart the picks into their smaller individual parts, then used florist wire to attach two pine sprigs together. (I’ll save the pine cones and berries for another project). I finished off the swags with a big red bow in the center and they turned out so cute!

And they are the perfect size to fit right above each of the windows. I used more hot glue to attach them to the felt.

Step 7: The last step to finishing up the felt tent covering is to line the two bottom edges with velcro. You’re just going to be using the scratchy side of the velcro because it sticks to the felt perfectly, so you don’t need the other side.
I underestimated how much velcro I would need, so I had to piece mine together until I can get to the store again. But I recommend running a continuous strip down both sides so it stays in place better. It’s just glued right onto the felt with hot glue.
Now place your felt tent covering over the wooden frame and wrap the bottom edges of the fabric around the bottom dowels and secure them tightly with the velcro.
Gingerbread Accessories
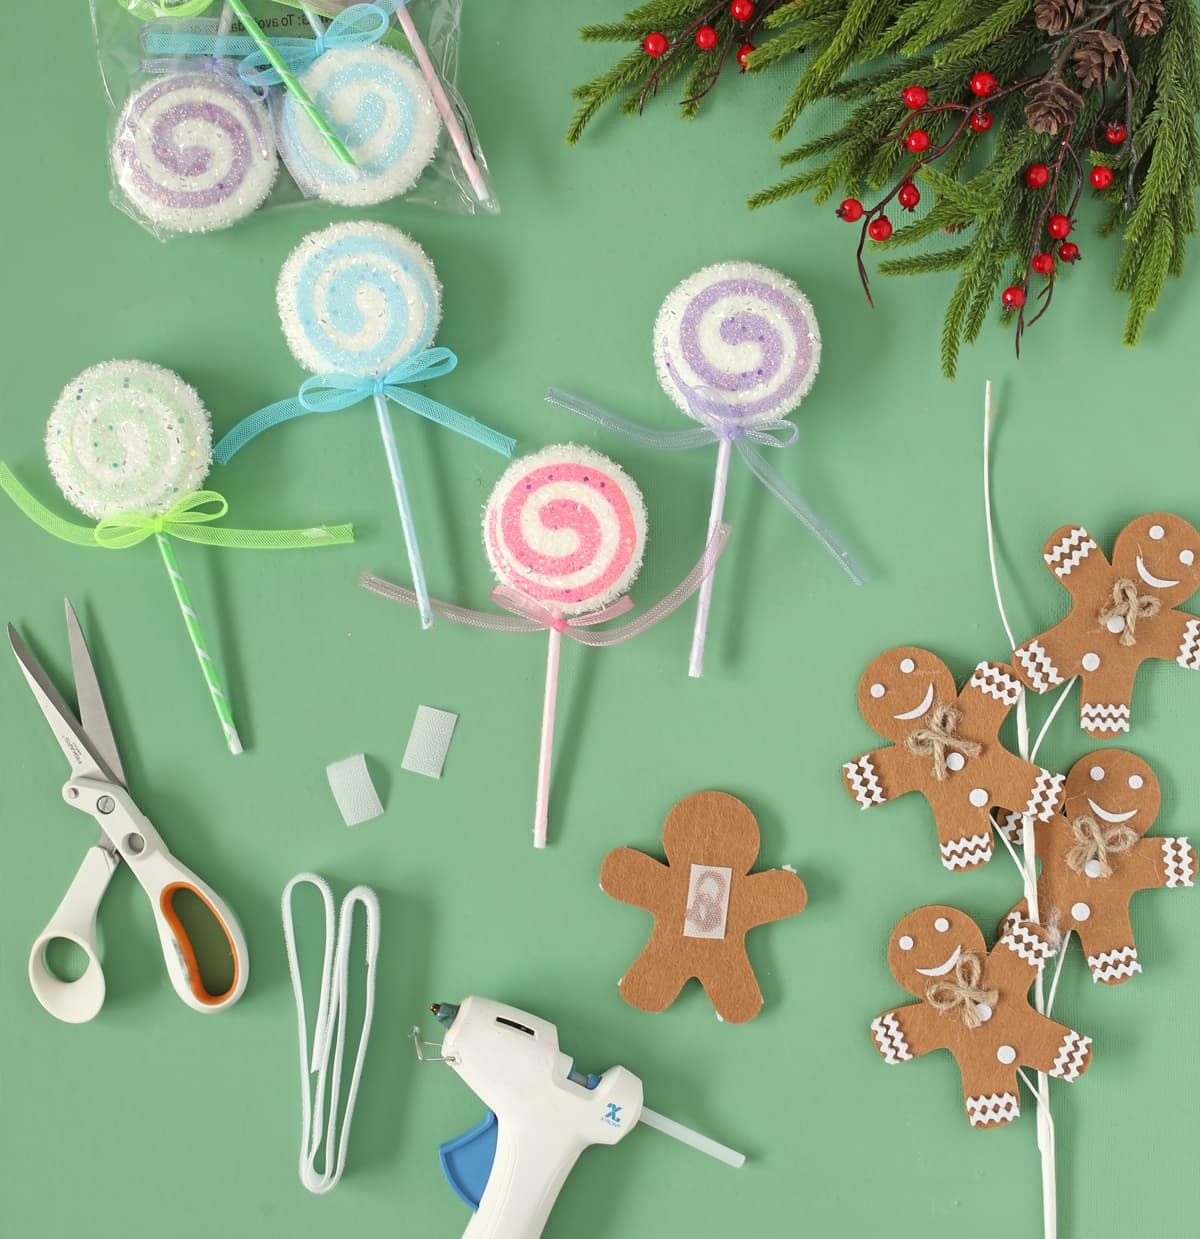
The last step is super simple, but really fun. We need to prep all the cute accessories!
I just hot glued little pieces of the scratchy side of velcro to the backs of all the candies so they will stick to the felt.
I also hung a little strand of battery lights inside the tent for a magical glow. Then I let my six year old add all the candies and accessories how he wanted. He is excited that he can redecorate his gingerbread house play tent over and over again.

I am so excited with how this cute project turned out. And one thing I REALLY love is that this style of tent folds flat for storage, so it will be very easy to tuck away when the holidays are over.
Time is flying so fast. My oldest child is already gone from home and it’s made me recommit to making the most of the time I have with the kids still at home because I know I will blink and they will be gone too. Motherhood is demanding, but also the most joy-filled part of my life. I’m going to keep working and pushing to fill my home with magic, memories and love because time is precious and a happy childhood is worth working for.
Trending Products

Scrapbook Tape, Double Sided Tape R...

Glue Point Clear Balloon Glue Remov...

Craft Knife Hobby Precision Knife S...

40 Rolls Washi Tape Set – 15 ...

Glue Dots, Craft Dots Dot N’ ...

Fiskars Sewing Kit, Gifts for Mom, ...

Wikki Stix for Doodlers – Kid...

Arts & Crafts Supplies Kits &#...

5 Pcs Pattern Tracing Stylus, Ball ...